Through this blog, we will explore and understand how we can set up the local environment in
Sitecore XM Cloud. You will find the entire process explained in steps.
What is Sitecore Experience Manager (XM) Cloud?
Sitecore XM Cloud is a fully SaaS-based cloud content management solution with the ability to
endlessly scale with the needs. XM Cloud cab be Easily created, manage, and deliver content
lightning-fast also it is High performance with headless architecture and endless flexibility.
We can implement XM Cloud Environment in our local system but for that, we need to fulfil the
below requirements.
XM cloud setup now requires docker setup in local machine.
Prerequisites for setup
It’s important you run Windows Pro and not Windows Home edition as in the home edition you won’t
be able to utilize Hyper-V.
It’s also advisable that you’re running at least 16GB of RAM because Docker will very slow down
your system if Your RAM space is low
-
DotNet 6 SDK – Find an appropriate download here. Installing a .Net SDK will include
the
overall runtime and does not require a separate installation. You can check to see if
you
already have .Net SDK 6.0 installed by executing the dotnet --info command in
your
terminal.
-
.NET Framework 4.8 SDK - Find an appropriate download here.
-
Docker 4.11.1 for Desktop - Find an appropriate download here with Windows
Containers
enabled. Other versions may also work, but this version was found to be the most
appropriate with this version of the XM Starter Kit.
-
Node LTS – Find an appropriate download here. It
Should be at least v18.13.0
-
PowerShell 5.1
-
Hyper-V enabled from within Turn Windows features on or off in the Control Panel.
-
If you don't have an account on the cloud portal, just register yourself
at
https://portal.sitecorecloud.io/. If you already have access to the XM Cloud
portal
then you can skip this.
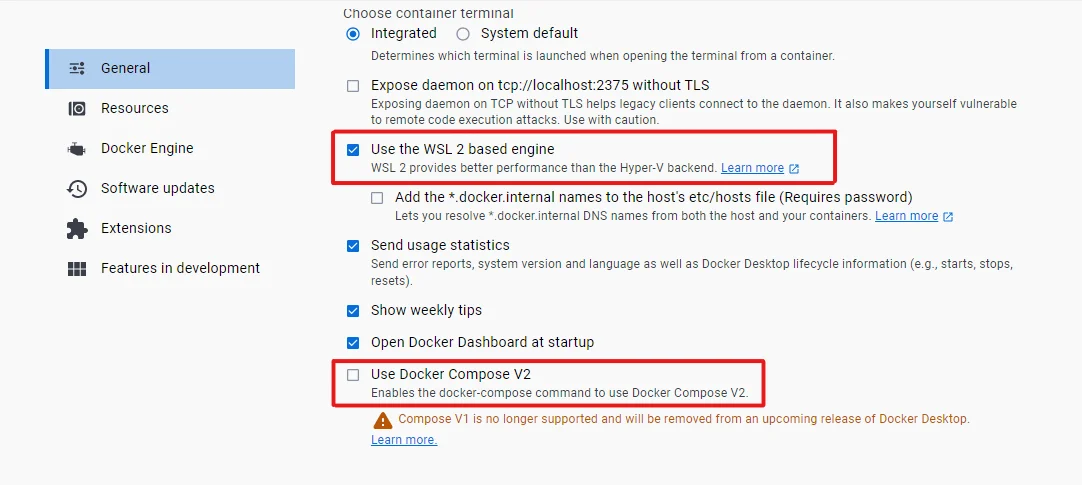
For this setup, we need Docker 4.11.1 and here are the things required for the Docker setup.
Once you have installed the Docker 4.11.1 you have to ensure that "Use Docker Compose V2" is
unchecked and "Use the WSL 2 based engine" is checked.
Switch To Windows Containers in Docker from the Windows
system tray
In the Windows System Tray right click on the Docker icon, and if you see the option "Switch to
Linux containers" then it is alright as this will ensure that you are running using Windows
Containers.
When Docker is installed it uses Linux Containers by default. So, when you see "Switch to Windows
container" then click on it. It will change this but you may have to run an additional
PowerShell script as shown below and need to restart the Docker.

If this will not work, then it's most likely that "Hyper-V" is not enabled. To enable it Go to
the "Turn Windows features on or off" in the control panel and check the "Hyper-V" and save this
setting. Now run the above script again and it will change the docer to a Windows container.
Pre-Initialization for local evs setup
Before running the setup, please make sure that IIS is stopped by running the following command
on your local environment.
You will likely run into errors when trying to bring up the Docker environment while IIS is
running.

Also, you have to stop Solr if any is running on your local machine. You can check it in Services
and stop it there. Make sure that nothing is running on port 8984.
Set up Steps:
-
Clone the GitHub repository on your local machine from:
https://github.com/sitecorelabs/xmcloud-foundation-head,
unzip it and I recommend
placing it in a short directory off the root. It will save you from in the future with
long Windows folder structures and names. (I have cloned it at C:\sitecore\xmcloud)
-
Place a valid Sitecore XM Cloud license file in the C:\sitecore\License.
-
Open PowerShell and cd to the folder where you have cloned the XM Starter Kit
directory. In my case command will be cd C:\sitecore\xmcloud.

-
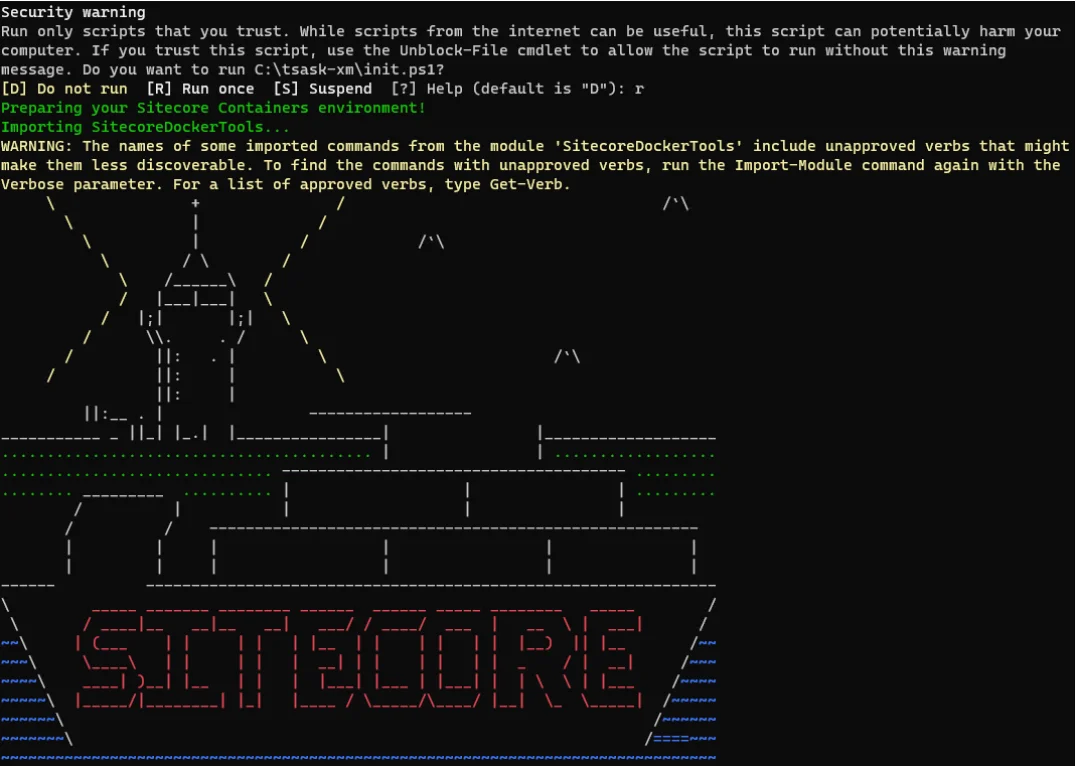
Now run the below command to initialize the environment. Change the path of license path
and password to yours.

-
After applying the above command you will be lead to a screen that looks like the below
image.
-
After this, it will install the appropriate certificates.
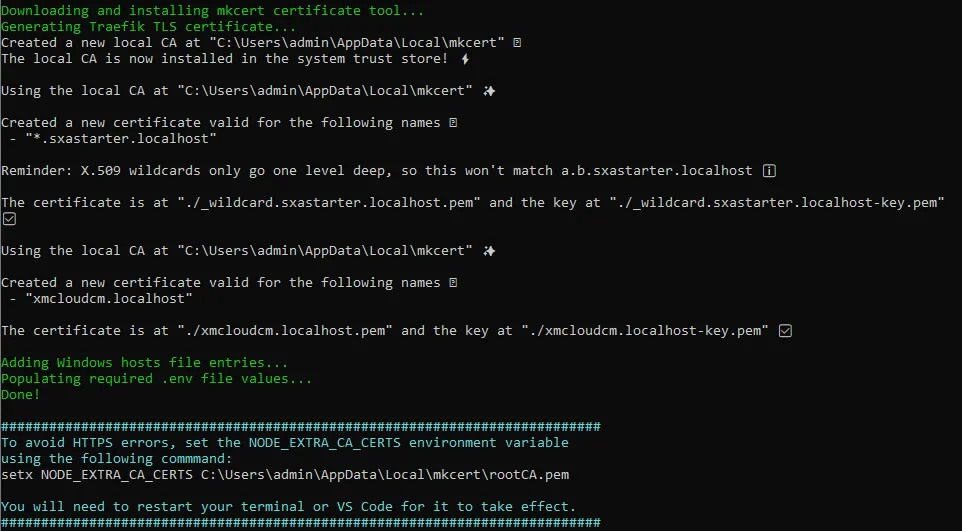
Please note the last message. If you had not run this command before you will need to run this
command if that massage appears.

This should only need to be done once if you're running multiple XM kits in a local environment.
-
Now close the PowerShell window, and again open it as administrator and CD to the same
folder.
-
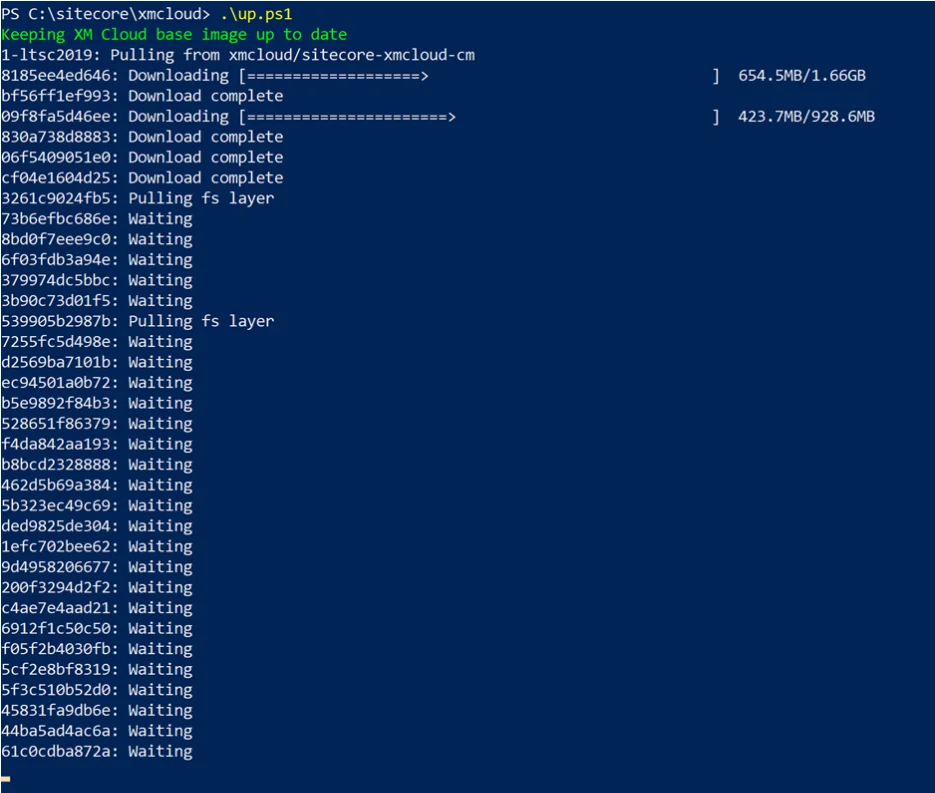
Run the Up command: .\up.ps1 . This command will take some time to execute as it
will
download the Sitecore docker images, install them and configure the containers.
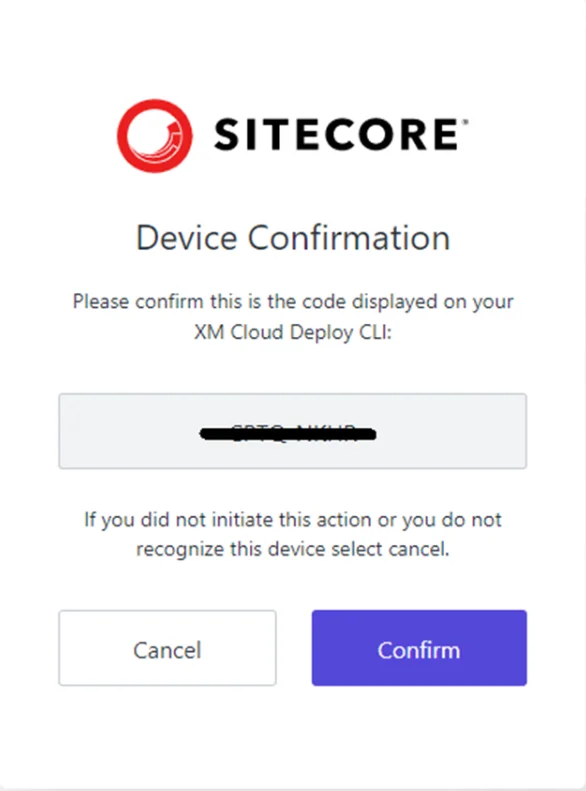
If it runs successfully then you will get a Device Confirmation screen.
In this confirmation, one id will be shown this id will be the same id, which is generated when
the above process will be done.
-
Once confirmed you have to log in to the XM cloud portal.
-
After you log in to the portal, you will see additional changes being made, populate the
schema and build the indexes.
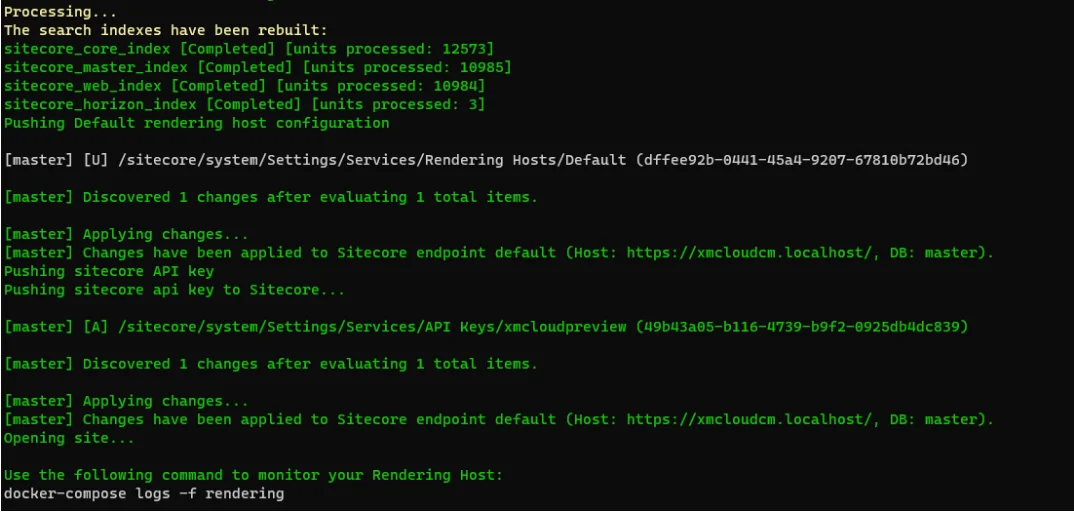
-
Once it ready, it will open XM Cloud local dev environment and you will be redirected to
Sitecore page which is
displaying the Launch Pad.
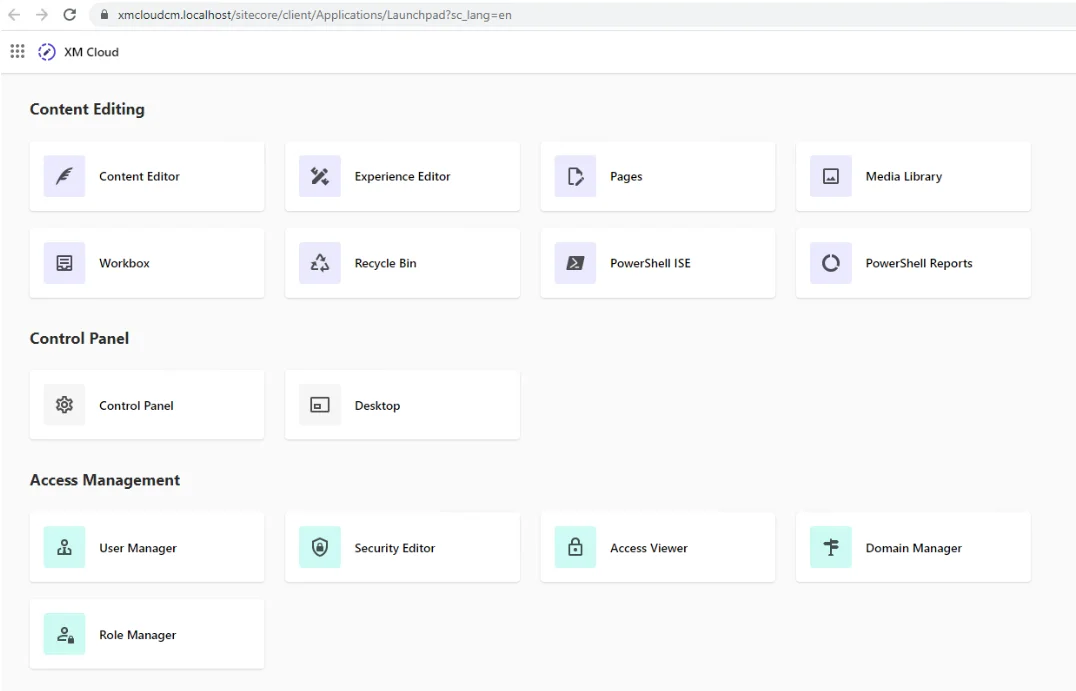
This is it. Your XM Cloud in the local system is ready to use. But in this, you can notice that
it has no project attached. When you expand the content, you can see the blank content file so
you have to serialize your project with XM Cloud.
When you follow the above-given processes and tips, you will be successfully able to set up the
local environment in Sitecore XM Cloud.
 BACK TO
SERVICE LISTSitecore Module Development Add new features, extend new features, or even replace, supplement and provide new functionality to Sitecore. Sitecore CMP & MRM Through the Sitecore CMP & MRM, drive execution, workflow, operations and processes of your entire marketing team. Sitecore Ordercloud Create a dynamic eCommerce platform and future-proof your business for B2B, B2C, B2X or any other marketplace business model. Sitecore Discover Provide real-time, personalized search results and recommendations for every individual shopper, all in one place.
BACK TO
SERVICE LISTSitecore Module Development Add new features, extend new features, or even replace, supplement and provide new functionality to Sitecore. Sitecore CMP & MRM Through the Sitecore CMP & MRM, drive execution, workflow, operations and processes of your entire marketing team. Sitecore Ordercloud Create a dynamic eCommerce platform and future-proof your business for B2B, B2C, B2X or any other marketplace business model. Sitecore Discover Provide real-time, personalized search results and recommendations for every individual shopper, all in one place.